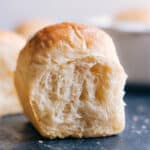
Dinner Rolls
Our favorite Life-Changing No-Knead Dinner Rolls are made easy with no stand mixer, no hand mixers, and no kneading required! These rolls rise high with big soft centers and perfectly crisp edges. Yes, really, these rolls are life-changing!
Servings12 rolls
Calories225kcal
Cost$4.12
Ingredients
- 5 tablespoons unsalted butter, divided
- 3 teaspoons instant yeast (or active dry --see Note 1)
- 3 tablespoons honey, separated
- 1-1/2 cups warm water
- 2 large eggs
- 4-1/2 cups (615g) white, all-purpose flour, plus more for shaping rolls
- 2 teaspoons fine sea salt
Instructions
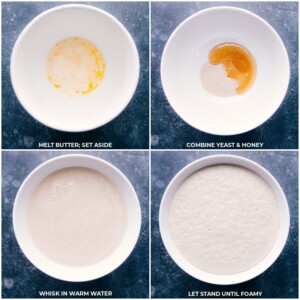
- BUTTER: In the microwave, melt 4 tablespoons butter in a medium-sized microwave-safe bowl and set aside to come to room temperature.
- YEAST: Meanwhile, in a medium-sized bowl add 3 teaspoons yeast and 1 tbsp. honey. Pour 1-1/2 cups warm water over (Note 2). Whisk and let sit 5-10 minutes (It should look creamy/foamy after 5 minutes (see photo). If not, the yeast is either dead or the water was too hot and you'll need to begin again or rolls won't rise.
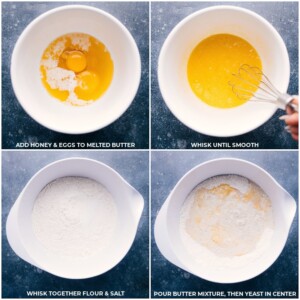
- BUTTER: To the melted butter bowl, add the remaining 2 tbsp. honey and 2 large eggs. Whisk until smooth and completely combined.
- FLOUR AND SALT: In a very large bowl add 4-1/2 cups flour (weighing 615 grams if you have a scale!) and 2 tsp salt. Whisk. Make room in the center to add wet ingredients. Use a spatula to scrape every bit of the butter mixture and then the yeast mixture into the middle of the flour. Stir with a strong rubber spatula until a thick, shaggy dough forms with no dry streaks of flour (see photo -- it is sticky/wet). Cover with plastic wrap.
- Two options for how to proceed:MAKE ROLLS TODAY: Let dough rise in a draft-free environment (~70 degrees F) for 90-120 minutes or until nearly tripled in size. (This is always 90 minutes at my home).MAKE ROLLS TOMORROW: Let dough rise in a draft-free environment (~70 degrees F) for 30 minutes. Then place on the bottom shelf of a fridge and refrigerate for 8 hours up to 12 hours (no longer). Remove and let stand at room temperature for 30 minutes or until dough is about 3 times the initial size.
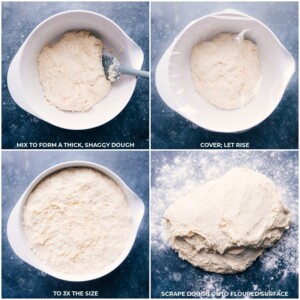
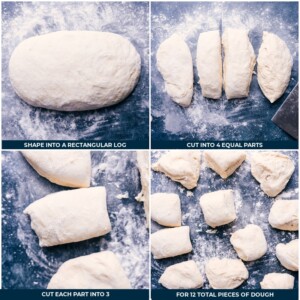
- SHAPE ROLLS: Spray a 9x13-inch pan generously with cooking spray.Sprinkle a large clean work surface with flour then tap all your fingers in flour. Dip a spatula in the flour. Use the flour-dusted spatula to scrape all the dough onto the floured surface. Sprinkle flour on top and then shape dough into an even-sized rectangular log. Cut into 4 equal pieces (just eyeball it!) and then each piece into 3 more pieces. (You will have 12 balls of dough.) Dust fingers and knife liberally as needed with more flour so the dough doesn't stick.
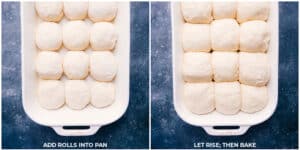
- SHAPE ROLLS, CONT.: Working with one piece of dough at a time, use your fingers to pull the dough from the top, keeping a smooth top, and pinching it underneath. Place the pinched side on the work surface and gently roll the ball using your other hand to guide it into a round ball (the video is helpful here). Set shaped balls into prepared pan. Repeat with remaining dough balls to get a tray filled with 4 rows of 3 rolls each. Lightly spray plastic wrap with cooking spray and set over rolls. Let rise for 20-30 (up to 45) minutes or until nearly doubled in size.
- BAKE: While rolls are rising, preheat the oven to 350 degrees F. Once the rolls have risen, remove plastic wrap and bake for 45-50 minutes or until the surface is golden brown and the rolls sound hollow when tapped. Remove from the oven and brush on the remaining 1 tablespoon of butter.
- ENJOY: Let slightly cool and then dig in! Rolls are best served same day, warm.
Notes
Note 1: Yeast: Instant yeast is best here, but you can use active dry. Just note that rise times are typically a bit longer with active dry yeast.Note 2: Water temperature: Drizzle a few drops of the warmed water onto the inside of your wrist. If it is warm and comfy for you, it will be perfect for the yeast. If it is not warm and instead feels hot, it will be too hot for the yeast. Too cold and the yeast will simply remain dormant.Note 3: Storage: These rolls are best the same day they're made. It's important that the rolls are fully cooled before being stored. Place rolls on a cooling rack and leave them at room temperature for about an hour. When they're fully cooled, you can store them. Wrap individually or store in a large, airtight bag. Store at room temperature (cool air from the fridge will make them go stale quicker).Note 4: How to freeze dinner rolls: Let rolls fully cool before wrapping them all together in foil. Place foil-wrapped rolls in an airtight bag and freeze. To thaw frozen dinner rolls: remove rolls the night before, letting them thaw at room temperature overnight. Loosen foil and then re-warm (in foil) for about 10 minutes in a 300-degree F oven. Serve immediately while warm (they dry out as they cool). Heads-up: Dinner rolls do lose texture and flavor the next day or after being frozen and thawed.
Nutrition
Serving: 1serving | Calories: 225kcal | Carbohydrates: 36.6g | Protein: 5.8g | Fat: 6.1g | Cholesterol: 43.7mg | Sodium: 14mg | Fiber: 1.4g | Sugar: 4.5g
Comments
Post a Comment